


 RCB E2 SERIES BRAKING SYSTEM
 RCB S1 SERIES BRAKING SYSTEM


Recommended Additional Upgrades
01
S1 FL 30th Anniversary Special Edition Brake & Clutch Set
Get the Combo set for the ultimate brake system upgrade.
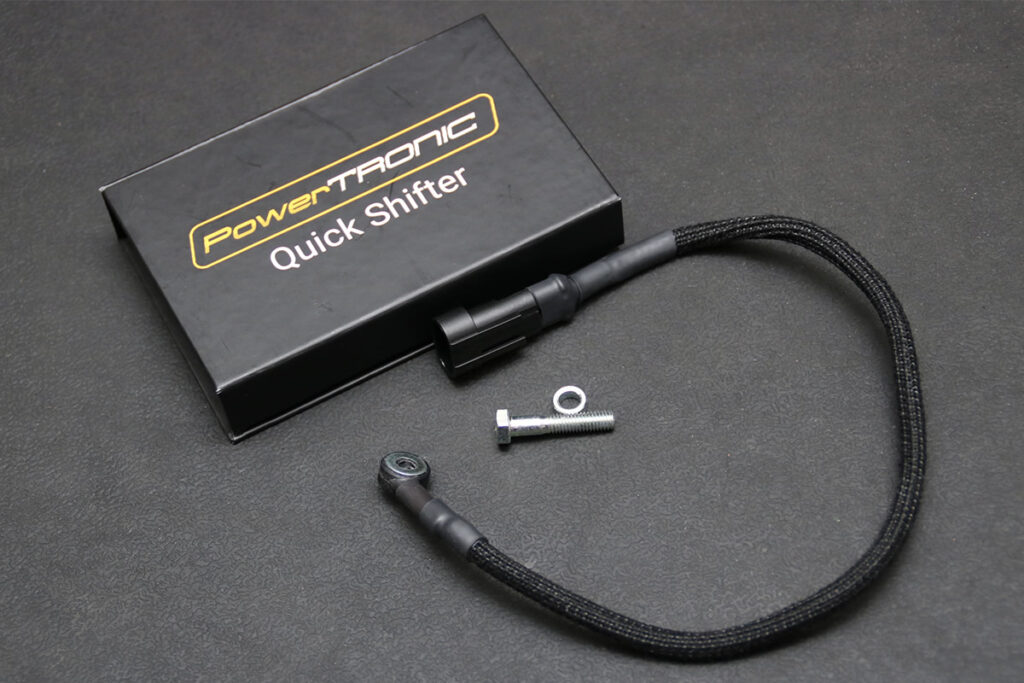
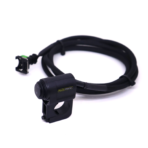
PowerTRONIC Handlebar Map Switch for the PowerTRONIC V4 is a premium electronic accessory that puts complete control over your motorcycle’s engine performance directly at your fingertips.
Designed for on-the-fly tuning calibration, this switch plugs directly into your PowerTRONIC V4 piggyback ECU harness. It allows you to instantly toggle between two completely different ignition and fuel maps while riding, giving you the flexibility to adapt to changing weather, fuel quality, or track conditions without stopping.
Key Features & Electronic Design
-
Dual-Map Instant Toggle: Enables lightning-fast switching between Map 1 (typically configured as a fuel-efficient or standard street map) and Map 2 (typically a highly aggressive track/race calibration).
-
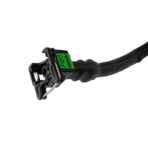
Plug-and-Play Integration: Features a pre-molded, waterproof connector that pins directly into the dedicated map-switch auxiliary lead on your PowerTRONIC V4 wiring loom. There is absolutely no wire cutting or splicing required.
-
Weatherproof Construction: The switch assembly is encased in a durable, impact-resistant composite housing. It utilizes sealed internal contacts to lock out rainwater, dust, and corrosive road grime during intense downpours.
-
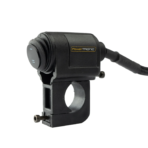
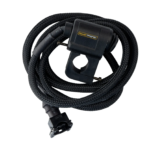
Low-Profile Handlebar Clamping: Engineered with a compact, ultra-slim form factor that mounts directly onto any standard 22mm (7/8 inch) handlebar or clip-on tube without cluttering your master cylinder or mirror perches.
-
On-The-Fly Actuation: Changes your engine dynamics instantly. The ECU processes the map shift within a fraction of a millisecond, meaning you can flip the switch mid-ride and feel the engine character change immediately.
Technical Specifications
| Feature | PowerTRONIC Map Switch Details |
| Control Interface | 2-Position Heavy Duty Toggle |
| Harness Connection | PowerTRONIC Auxiliary 2-Pin Dedicated Connector |
| Clamp Diameter | Standard 22 mm (7/8 Inch) Bar Compatibility |
| ECU Generation | Optimized for PowerTRONIC V4 (Backward Compatible with V3) |
| Housing Grade | IP65 Weatherproof Reinforced Polymer |
| Wiring Length | Extended Loom for Clean routing from handle to seat area |
Step-by-Step Installation & Loom Routing
To ensure your switch works flawlessly and doesn’t snag when turning the handlebars, follow this precise installation sequence:
1.Position the Switch Mount: 5 mins.
Place the motorcycle securely on its stand. Select a convenient location on the left handlebar near the switch cluster, slide the clamp over the 22mm bar, and tighten the clamping bolt until snug. Do not overtighten.
2.Route the Wiring Loom: 10 mins.
Guide the switch wire down the handlebar tube following the factory wiring loom. Wrap the handlebar completely from lock to lock to verify that the wire has enough slack and is not pulling tight or pinching against the frame bump stops.
3.Pass the Main Frame Rails: 10 mins.
Run the wire underneath your fuel tank shroud along the motorcycle’s main frame spine. Use zip-ties to secure the cable away from hot engine components, sharp metal brackets, or high-tension ignition coils.
4.Plug-and-Play Connection: 5 mins.
Locate the auxiliary map connector on your main PowerTRONIC V4 harness under your seat. Remove the protective dust cap and plug the switch connector in firmly until you hear the safety locking tab click home.
R-Tune Software Verification & Map Assignment
Once the hardware is connected, you must verify that the map switch is communicating properly with the ECU by connecting to the PowerTRONIC R-Tune software via your PC or mobile app:
-
Establish ECU Connection: Turn your motorcycle’s ignition key to the “ON” position (do not start the engine) and boot up your R-Tune configuration window.
-
Verify Switch Polarity: Navigate to the Live Dashboard screen. Locate the Current Map Indicator readout. Flip the handlebar switch back and forth—the software display should instantly toggle between showing “Map 1” and “Map 2.”
-
Upload Your Configurations: Use the file manager to burn your chosen calibrations to the ECU storage banks. A popular setup profile includes loading a conservative, smooth torque curve on Map 1 for wet weather/commuting, and loading an aggressive ignition-advanced curve on Map 2 for maximum acceleration.
-
Confirm Live Syncing: Start the engine and let it idle. Flipping the switch should show an immediate, subtle shift in target engine RPM and exhaust note if the idle fuel map settings differ between the two maps, confirming successful live integration.